16 Macros
- Understand what macros are and how they are used.
- Learn how to activate the Developer tab.
- Learn how to record a macro using the macro recorder.
- Learn how to modify a macro.
- Learn how to create a command button to run a macro.
- Understand macro security settings.
You can automate repetitive tasks in Microsoft Excel using macros. A macro consists of a series of commands and functions that are executed sequentially with a single command or the press of a button.
Macros are primarily intended for frequently performed actions or complex operations. Using macros can increase efficiency and reduce the chance of errors.
Simple macros, consisting of a sequence of actions, can be recorded using the built-in macro recorder. More complex macros are programmed in the VBA (Visual Basic for Applications) programming language. This chapter focuses on simple macros, for which you do not need any programming knowledge.
The language used for Excel macros is Visual Basic for Applications (VBA). Macro commands and functions are stored in a Visual Basic module. The Visual Basic Editor allows you to edit macros, copy macros between modules or workbooks, and rename modules and macros.
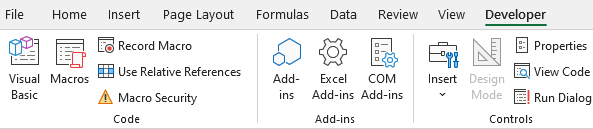
16.1 Developer Tab
To record, edit, and run macros, the Developer tab must be visible on the ribbon.
Several Excel functions, including those for Macros and VBA, are located on the Developer tab. This tab is not shown by default when Excel is installed and therefore needs to be made visible first. This is a one-time action.
First, check if the Developer tab is already present on the ribbon. If so, you can skip this task.
Task 16.1
- Choose File > Options > Customize Ribbon.
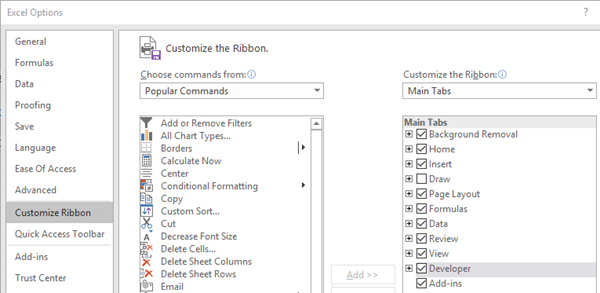
- Under Main Tabs on the right, check the Developer box and click OK.
The Developer tab should now be visible on the ribbon (see Figure 16.1).
16.2 Macro Security Settings
Macros can potentially be used for malicious purposes, such as installing a virus. Excel’s security settings can block such threats. However, if the settings are too restrictive, you won’t be able to run legitimate macros; if they are too lenient, you won’t be protected. A good compromise is the setting that prompts you to decide whether to allow macros, which is also the default setting.
Change Settings
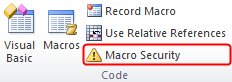
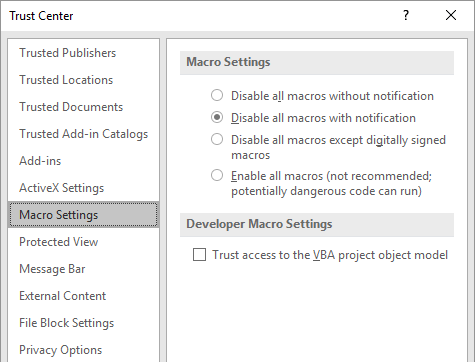
To view or change macro security settings, click on Developer tab > Macro Security (Code group).
The Trust Center dialog box will appear.
| Setting | Explanation |
|---|---|
| Disable macros without notification | Choose this option if you do not want to allow macros. All macros in documents are disabled, along with security alerts about macros. Documents containing macros that you trust can be saved in a trusted location; documents in trusted locations run without security checks. |
| Disable macros with notification | This is the default setting and generally the best choice. With this setting, you will receive a security alert allowing you to choose whether or not to run macros on a case-by-case basis. |
| Disable macros except digitally signed macros | A macro creator can digitally sign a macro. If you designate this creator as a trusted publisher, their signed macros will run without warnings. All unsigned macros will be disabled without notification. |
| Enable all macros (not recommended) | Choose this option if you want to run all macros. This option is not recommended because it leaves your computer vulnerable to potentially malicious code. |
16.3 Recording Macros
Simple macros can be created by recording your actions using the built-in macro recorder. After starting the recorder, all actions are recorded and converted into VBA code in the background. This continues until you stop the recorder.
To ensure a properly working macro, it’s important to first perform the actions manually and write them down step-by-step. You can then use this script to record the actions accurately with the macro recorder.
The button to start recording macros is on Developer Tab in the group Code, see Figure 16.1.
When you click this button to start recording a macro, a dialog box appears where you can enter several properties for the macro.
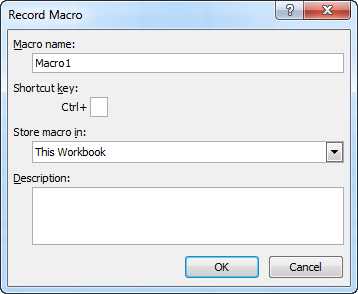
Macro name
Each macro must have a unique name. Excel suggests a default name like “Macro1”. You can change this by typing a different name.
The first character of a macro name must be a letter. Subsequent characters can be letters, numbers, or underscores. Spaces are not allowed in macro names. Always use meaningful names that indicate what the macro does. The underscore can be used as a word separator (e.g., Format_Cell_Red).
Shortcut key
Macros can be run from the menu or via keyboard shortcuts. These are typically CTRL combined with a letter key (e.g., Ctrl+Shift+A if you use an uppercase letter, or Ctrl+a if you use lowercase). If you want to assign a shortcut key, enter a letter in the box. For example, entering ‘a’ (lowercase) will assign Ctrl+a.
Assigning a shortcut key is not required but can be very useful for frequently used macros. Be careful not to overwrite existing Excel shortcuts.
Store macro in
You can choose where to store the macro:
- This Workbook: The macro will only be available in the current Excel file.
- New Workbook: The macro will be stored in a new, blank workbook that is created. (This option is rarely used for general macros).
- Personal Macro Workbook: The macro is stored in a special hidden workbook (
Personal.xlsb) that opens automatically when Excel starts. Macros in this workbook are available in any Excel file you open.
Think carefully about this. If the macro is specific to the active workbook, choose This Workbook. If you want the macro to be available globally in Excel, Personal Macro Workbook is the best choice. The default is This Workbook.
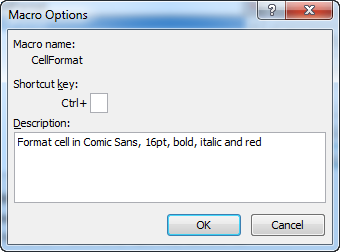
Description
It’s recommended to provide a brief description of what the macro does. While you’ll remember its purpose when you create it, a description is helpful for future reference. This is optional.
All these choices (name, shortcut, storage location, description) can be changed later.
16.4 Macro Cell Format
Objective
Create a macro named CellFormat that formats the selected cell’s text to Comic Sans MS font, bold, italic, 16 pt, and red. The column width should also be adjusted to fit the cell’s content.
Task 16.2 Record macro
Start with an empty worksheet and enter some text in a cell (e.g., cell A1).
Select the cell containing the text.
Go to Developer tab > Record Macro (Code group).
In the Record Macro dialog box, enter the following:
- Macro name: CellFormat
- Shortcut key: (leave empty)
- Store macro in: This Workbook
- Description: Formats selected cell to Comic Sans MS, 16pt, Bold, Italic, Red, and autofits column.
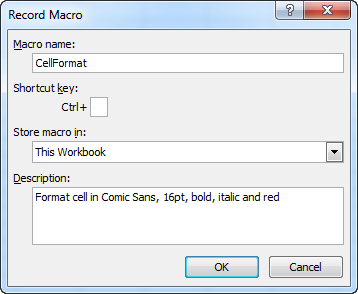
Click OK.
Perform the following actions on the selected cell:
- Right-click on the cell and choose Format Cells….
- Go to the Font tab
- Set Font: Comic Sans MS
- Set Font style: Bold Italic
- Set Size: 16
- Set Color: Red
- Click OK.
With the cell still selected, go to Home tab > Format (Cells group) > Autofit Column Width.
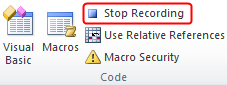
Go to Developer tab > Stop Recording (Code group).
Now, test the macro to ensure it works correctly.
Task 16.3 Testing the Macro
Enter some text in a different cell and select this cell.
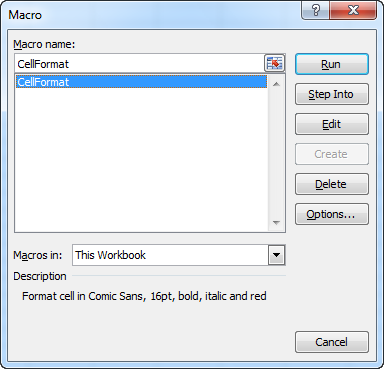
Go to Developer tab > Macros (Code group).
In the Macro dialog box, select CellFormat and click Run.
Verify that the cell is formatted correctly according to the macro’s actions.
Save the workbook. Since it contains a macro, you must save it as an Excel Macro-Enabled Workbook (*.xlsm). Name it
CellFormat.xlsm.
When saving a workbook containing macros, Excel might default to saving it as a standard Excel Workbook (*.xlsx). This format cannot store macros. You must manually change the “Save as type” to Excel workbook with macros with the extension *.xlsm.
16.5 Editing Macros
This task requires the CellFormat macro created in the previous section (Task 16.2).
You can modify a macro without re-recording it. Both the macro’s options (like shortcut key) and its underlying VBA code can be viewed and edited.
Objective
Make the following changes to the CellFormat macro:
- Assign the shortcut key “Control t”.
- Change the font size to 18 pt.
Task 16.4 Continue with the file CellFormat.xlsm from Task 16.3.
If necessary, open the
CellFormat.xlsmfile. (Enable content/macros if prompted).Go to Developer tab > Macros (Code group). The Macro dialog box will appear (see Figure 16.8).
Select the CellFormat macro and click Options.
In the Shortcut key box, enter t (lowercase). And in the Description box, change “16pt” to “18pt”. Then click OK.
With the CellFormat macro still selected in the Macro dialog box, click Edit.
The Microsoft Visual Basic for Applications (VBA) editor will open, displaying the macro’s code. In this code you will find text size 16 on two places:
Format cell in Comic Sans, 16pt, bold, italic and red
.Size = 16
Change
16to18in both places.Close the Microsoft Visual Basic for Applications window (click the X in the top-right corner of the VBA editor window).
Test the modified macro: Select a cell with text and press Ctrl+t. Verify the font size is now 18pt.
Save the workbook.
16.6 Creating a Command Button
You can run a macro in one of the following ways:
- Via the menu Developer tab > Macros > select macro > Run.
- Via an assigned shortcut key.
- Via a command button on the worksheet.
This task demonstrates how to create a command button on the worksheet for the CellFormat macro.
Task 16.5 Continue with the file CellFormat.xlsm from Task 16.4.
If necessary, open the file.
Go to Developer tab > Insert (Controls group).
In the Form Controls section, click on Button (Form Control)
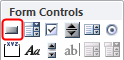
The mouse cursor will change to a small crosshair (+).
- Click and drag on the worksheet to draw a rectangle where you want the button to appear. Release the mouse button. The Assign Macro dialog box will immediately appear.
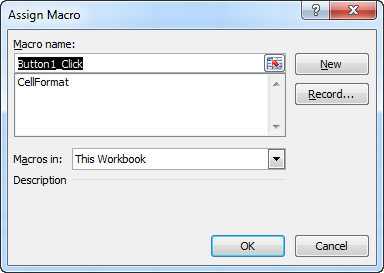
- Select the CellFormat macro from the list and click OK.
The rectangle you drew will become a button, typically with default text like “Button 1”.
- Right-click on the button and choose Edit Text. Select the default text and change it to something more descriptive, for example, “Format Cell”.

Click anywhere outside the button to deselect it.
Test the button: Enter text in a cell, select the cell, and click your new Format Cell button.
Save the workbook.
16.7 Tips
16.7.1 Relative vs. Absolute References
By default, recorded macros use absolute cell references. This means the exact cell addresses (e.g., A1, C5) are hardcoded into the macro. The macro will always affect those specific cells, regardless of which cell is active when you run it (unless the recorded actions inherently refer to Selection).
If you want a macro to operate relative to the currently active cell (e.g., “move one cell to the right of the active cell”), you need to enable Use Relative References before you start recording those specific steps. This button is located on the Developer tab (Code group).
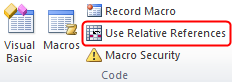
The “Use Relative References” mode is a toggle. It stays active (or inactive) until you click the button again to change its state. Always check its status before recording if reference type is important.
16.7.2 Deleting Macros
To delete a macro:
- Go to Developer tab > Macros (Code group).
- Select the macro you want to delete from the list.
- Click the Delete button.
- Confirm the deletion.
16.8 Exercises
Exercise 16.1 Background Color Macro (macr001)
Record a macro that applies a light gray background color to the currently active cell.
An example of a solution.
Sub Background_Gray()
'
' Lightgray background for active cell
'
    With Selection.Interior
        .Pattern = xlSolid
        .PatternColorIndex = xlAutomatic
        .ThemeColor = xlThemeColorDark1
        .TintAndShade = -0.14996795556505
        .PatternTintAndShade = 0
    End With
End Sub
Exercise 16.2 Percentage Formatting Macro (macr002)
Record a macro named PercentageFormat that formats a numeric value in the selected cell as a percentage with one decimal place and also centers the content horizontally within the cell.
An example of a solution.
Sub PercentageFormat()
'
' Numeric value formatted as percentage with 1 dec. and horizontally centered
'
    Selection.NumberFormat = "0.0%"
    With Selection
        .HorizontalAlignment = xlCenter
    End With
End Sub
Exercise 16.3 Formatting Cell A1 (macr003)
Record a macro that performs the following actions specifically on cell A1 (or related row/column):
- Sets the height of row 1 to 18.
- Sets the width of column A to 3.
- Formats the text in cell A1 to Tahoma font, size 14, bold, and blue color.
An example of a solution.
Sub FormatA1()
'
' exercise macr003
'
    Rows("1:1").Select
    Selection.RowHeight = 18
    Columns("A:A").Select
    Selection.ColumnWidth = 3
    Range("A1").Select
    With Selection.Font
        .Name = "Tahoma"
        .Size = 14
        .Bold = True
        .Color = -4165632
    End With
End Sub
Exercise 16.4 Printing Gridlines Macro (macr004)
Create a macro that ensures gridlines will be printed for the active sheet. This setting can be found underPage Layout tab > Page Setup group (dialog launcher) > Sheet tab.
An example of a solution.
Sub Print_Gridlines()
'
' exercise macr004
'
    With ActiveSheet.PageSetup
        .PrintGridlines = True
    End With
End Sub